Help:Editing/Your first edit: Difference between revisions
No edit summary |
m (Momo moved page Lets RP Wiki:Editing/Your first edit to Help:Editing/Your first edit) |
||
| (4 intermediate revisions by the same user not shown) | |||
| Line 5: | Line 5: | ||
== Walkthrough == | == Walkthrough == | ||
=== Spotting an error === | === Spotting an error === | ||
Finding an error to fix can sometimes be hard, but there are definitely pages that need fixing; the wiki is far from perfect. Let's assume you've found a page with something simple to fix (e.g. just something in the prose). | Finding an error to fix can sometimes be hard, but there are definitely pages that need fixing; the wiki is far from perfect. Let's assume you've found a page with something simple to fix (e.g. just something in the prose). | ||
=== Opening the editor === | === Opening the editor === | ||
| Line 20: | Line 18: | ||
=== Editing the page === | === Editing the page === | ||
Now, I'm just going to edit the introduction. This bit is just plain text with no additional stuff; so to edit it, we just select where to type, and type there. You can select text to copy, paste, delete, etc. A new paragraph can be created by pressing enter. | Now, I'm just going to edit the introduction. This bit is just plain text with no additional stuff; so to edit it, we just select where to type, and type there. You can select text to copy, paste, delete, etc. A new paragraph can be created by pressing enter. | ||
=== Saving the edit === | === Saving the edit === | ||
| Line 57: | Line 49: | ||
Now, we just click save. After a short time (don't close or reload the page during this; your edit may be lost if you do!), the edit is saved and the page automatically reloads to show the newest version of your page. | Now, we just click save. After a short time (don't close or reload the page during this; your edit may be lost if you do!), the edit is saved and the page automatically reloads to show the newest version of your page. | ||
And that's it! The edit has been saved and is viewable to all. | And that's it! The edit has been saved and is viewable to all. | ||
Latest revision as of 20:25, 7 February 2023
This is part 1 of the series of editing guides of the Let's RP Wiki. This guide is a step-by-step process to your first edit - or, how to edit plain text with the visual editor.
This guide is made from the perspective of a logged-in user with default preferences.
Walkthrough
Spotting an error
Finding an error to fix can sometimes be hard, but there are definitely pages that need fixing; the wiki is far from perfect. Let's assume you've found a page with something simple to fix (e.g. just something in the prose).
Opening the editor
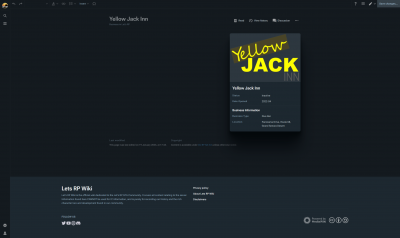
Opening the editor is simple; just click the Edit (the one that resembles a pen) button on the left or the right of the page title (depending on the width of the browser window).
You are now in the editor. It looks like the page, but some bits may move around, and there's an edit toolbar at the top. This editor is called the VisualEditor, a WYSIWYG (what you see is what you get) editor. It behaves like any word processor (e.g. Microsoft Word). Feel free to click around and explore the parts of a page and what they look like when left-/right-clicked.
Editing the page
Now, I'm just going to edit the introduction. This bit is just plain text with no additional stuff; so to edit it, we just select where to type, and type there. You can select text to copy, paste, delete, etc. A new paragraph can be created by pressing enter.
Saving the edit
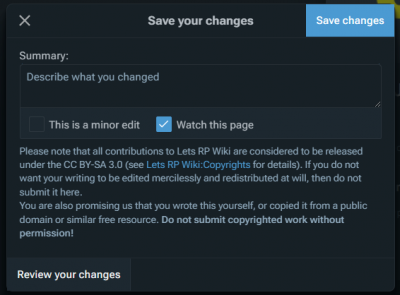
Saving an edit is done by clicking the 'Save changes' button on the right side of the toolbar. Click it to open the save dialogue.
In the dialogue, there's a textbox to put an edit summary and three buttons. First, we're going to check the 'Review your changes' button.
Reviewing changes
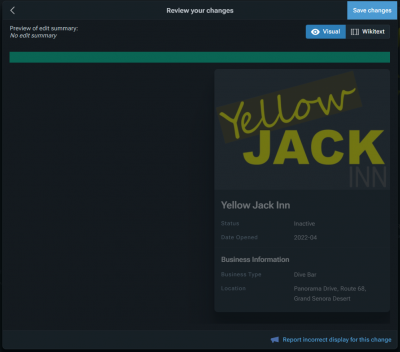
Changes are shown to you as a diff (which you may be familiar with if you use tools like git). The left column of text (with the green theme) is the currently viewable page, and the right column (with the blue theme) is the text as you've changed it. Lines with something that has changed have a thick left border, and lines with nothing changed are flat grey. Text that was added, changed, or removed is highlighted in green on the left, and the replacement (and new) text is highlighted in blue on the right. This text is in a markup language known as wikicode (covered in greater detail with later guides).
What we're looking for is twofold: double-check our changes are what we want to do (proofread it), and see if anything has changed that should not have changed. The VisualEditor has persistent bugs that can cause it to insert/delete a lot of extraneous text. If you notice this has happened to you, it may be possible to fix it by using source mode (see source mode introduction guide); however, you might have to start the edit over. Luckily, our example edit seems fine so we'll continue.
It is optional but recommended to do this for every edit.
Saving
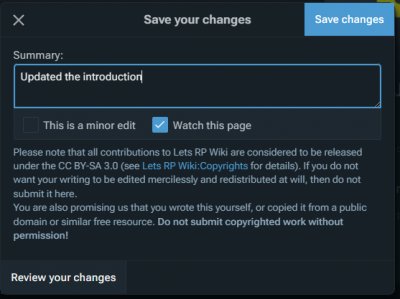
Clicking Return to save form brings us back to the previous form. Here we're going to add an edit summary and finally save the page.
An edit summary is a comment attached to your edit that isn't visible on the page itself, but is publicly viewable when looking at the changes that have been made. You should try to succinctly summarise your edit so that other editors can see what you've done. You can be as brief or descriptive as you like, but bear in mind there is a 255 character limit. You can also use wikicode links in edit summaries if you like.
Edit summaries aren't subject to most style policies/guidelines, but they are subject to community ones (i.e. if you are rude to other users in a summary, that is grounds for a block as much as an edit). Edit summaries can't be changed after the fact, only deleted by an administrator (and only within certain criteria).
I've gone by simply describing the edit as "rewritten introduction".
Now, we just click save. After a short time (don't close or reload the page during this; your edit may be lost if you do!), the edit is saved and the page automatically reloads to show the newest version of your page.
And that's it! The edit has been saved and is viewable to all.
Common things to fix and not fix
There are several simple things you should fix if you see them, for example:
- Typos
- Links to incorrect places
- Incorrect or outdated information
- Poorly-formatted/worded paragraphs
Things you shouldn't change or should otherwise bear in mind:
- The wiki uses American spelling and style throughout to remain consistent both internally and with the setting that the world takes place. This means that:
- Words should be spelled using American English; common examples include "color" (not "colour"), "utilize" (not "utilise"), and so on.
- Dates should be in YYYY-MM-DD (ISO 8601) format.
- Always use sentence case unless the name is/includes a proper noun; i.e. don't capitalize names unless it is capitalized by Rockstar.
- Opinions are not valuable content; e.g. "The Sultan RS is the best car for criminals" is not appropriate, but "The Sultan RS is a sports car." is.
See also
- The next guide in the series is Project:Editing/VisualEditor basics, about using the VisualEditor to edit various other parts of an article. You may prefer to skip straight to source mode with Project:Editing/Source mode basics.
- Style guide of the Let's RP Wiki


